Use Netgear Router Setup to Optimize Your Network
Improve your WiFi experience right now and take advantage of a simple setup process.
All You Need To Know About Netgear Router Setup
Reliable internet access is ensured by the simple procedure of configuring a NETGEAR router setup. Start by turning on the router and attaching it to your modem via an Ethernet. You may use a cable linking or the default WiFi network to access the router’s settings. Go to http://www.routerlogin.net in a web browser and use the default login information from the user manual to log in. To set up a secure Wi-Fi network, adjust preferences, and modify your internet settings, follow the on-screen directions. The Nighthawk app from NETGEAR provides remote administration and monitoring for more sophisticated choices, guaranteeing smooth network control and connectivity.
Features Of Netgear Router Setup
- Simple Installation: Using the Nighthawk App or web interface, setting up a Netgear router is easy.
- Smart Wi-Fi Management: Remotely regulate access, monitor devices, and adjust Wi-Fi settings.
- Parental controls: It include time limitations, content blocking, and online activity monitoring.
- Guest Network Access: To protect your primary network, set up a separate network just for visitors.
- Advanced Security: Cybersecurity defense against attacks is offered by features like NETGEAR Armor.
- Firmware Updates: For improved security and performance, just upgrade the firmware on your router.
- Device Management: Control bandwidth distribution and view connected devices.
- QoS (Quality of Service): For a more seamless experience, give devices or apps priority.
- VPN Support: Gain remote, secure access to your home network.
Multi-device connectivity: Support for several devices using dual-band or tri-band networks is known as multi-device connectivity.

Different Method Of Setting Up Netgear Router
What Is The Netgear Router Setup IP
When setting up a Netgear router, the default IP address is usually 192.168.1.1 or 192.168.0.1. It gives users access to the router’s web interface for firmware upgrades, network configuration, and security settings. Connect your device to the router, launch a web browser, and input Netgear router setup IP address to gain access. Use http://www.routerlogin.net or consult the router’s documentation if it doesn’t work. follow these steps to access netgear router setup IP:
- Plug the router in, then use an Ethernet to link it to the modem.
- Make sure all required indicator lights are stable and turn on both devices.
- Use a LAN cable or Wi-Fi to attach your computer or mobile device to the router.
- Unveil a browser and put in Netgear router setup IP address of the router, which is frequently 192.168.1.1 or 192.168.0.1.
- Enter your password and username as they are by default.
- Resetting the router to its default settings is necessary if credentials are altered or lost.
- To identify and set up your internet connection, trail the netgear router setup commands.
- Depending on your ISP’s settings, select PPPoE, DHCP, or Static IP.
- Make a strong password and a distinctive name for your Wi-Fi network.
- WPA2 or WPA3 encryption can be used to change security settings.
- Test the assembly, save the settings, and restart if required.
Netgear Router Setup Without Modem
You may expand an existing network or create a new one by configuring Netgear router setup without modem. Take these actions:
- Turn on your NETGEAR router by beavering it into a power outlet.
- You may use an Ethernet cable or a computer or mobile device to connect to the router’s built-in Wi-Fi network.
- In the address box of the browser, type http://www.routerlogin.net. Enter your default login information.
- Set up the SSID and password in Wireless Settings if you’re using a router local network without internet connection.
- Go to Advanced Settings → Wireless Settings and turn on Access Point mode to expand an existing network. Use an Ethernet wire to connect the router to the main network.
- If required, apply the modifications and restart the router to accomplish Netgear router setup without modem process.
- For other options and monitoring, use the NETGEAR Nighthawk app.
What Is The Need To Setup Netgear Router As Access Point
You may increase the coverage of your current network by setup netgear router as access point. Take these actions:
- Turn on your NETGEAR router by connecting it to a power source.
- To join to the router’s Wi-Fi network, utilize an Ethernet or a computer or any device you want.
- Go to http://www.routerlogin.net with an open browser.
- Pass in provided user ID and keyword to log in.
- Go to Wireless AP under Advanced > Advanced Setup.
- Click Apply after choosing Enable AP Mode.
- Attach the LAN port of the NETGEAR router to the LAN port of the core router using an Ethernet.
- Either create a new network or match the SSID and password to your current one.
- If required, restart and apply the adjustments.
- For more details about setup netgear router as access point, its settings and monitoring, use the NETGEAR Nighthawk app.
Why To Setup Netgear Router As Bridge
By establishing a wireless connection with another router, you may use your NETGEAR router as a bridge to expand your current network. Take these actions to setup netgear router as bridge:
- Turn on your NETGEAR router by connecting it to a power source.
- Join a PC or mobile device to the router via an Ethernet or Wi-Fi.
- Navigate to http://www.routerlogin.net via a web browser.
- Pass in the provided username and keyword to log in.
- Navigate to Wireless Bridge under Advanced > Advanced Setup.
- Click Apply after selecting Enable Bridge Mode.
- Enter the current Wi-Fi network’s SSID, password, and security configuration.
- For a reliable connection, position the NETGEAR router close to the primary router.
- Reboot and apply adjustments if necessary.
- Utilize the NETGEAR Nighthawk application for tracking and troubleshooting.
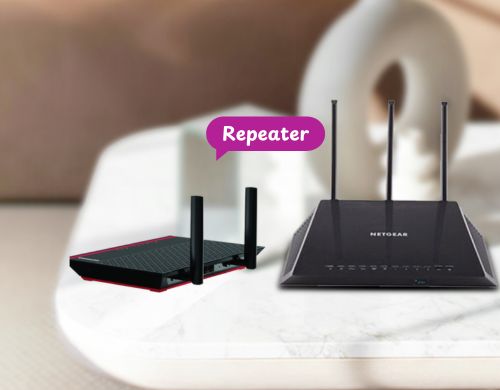
How To Setup Netgear Router As Repeater
By strengthening the signal, you may increase the coverage of your current Wi-Fi network by configuring your NETGEAR router as a repeater. Take these actions to setup netgear router as repeater:
- Turn on your NETGEAR router by beavering it into a power font.
- Link with an Ethernet or WiFi on a PC or mobile device.
- Launch browser, steer to routerlogin.net, and enter the provided netgear router login information.
- Go to Wireless Repeating under Advanced > Advanced Setup.
- Choose Repeater mode after selecting Enable Wireless Repeating Function.
- Provide the current Wi-Fi network’s SSID, password, and security type.
- Make that the router’s static IP address corresponds to the subnet of your network.
- It should be positioned midway between the region that needs coverage and your primary router.
- If necessary, restart and apply the adjustments.
- To monitor and troubleshoot your network, use the NETGEAR Nighthawk app.
FAQs
How is my Netgear router configured?
Use an Ethernet wire to link your modem and router. Turn it on, then use a browser to go to http://www.routerlogin.net and follow the on-screen directions.
What is my Netgear router's default login?
Unless otherwise specified during netgear router setup, the default username is admin and the default password is password.
Why is routerlogin.net unavailable to me?
Make sure your device is linked to the network of the router. Try using 192.168.1.1 as the IP address if it still doesn’t work.
How can my Netgear router be reset?
For approximately ten seconds, press and hold the router’s Reset button until the power LED begins to blink.
How do I update the firmware on my Netgear router?
Navigate to Advanced > Administration > Firmware Update after logging in to the router’s web interface, then follow the directions.
What happens if I can't remember my router's password?
Use the default username and password to log in after doing a factory reset to return everything to its original configuration.